Download our web app! Download

Install Kali Linux in VmWare Windows 10 guide 2020 | How to install Kali Linux In Windows 2020.

Install Kali Linux in Vmware Windows 10 Install Kali Linux on windows full guide.

Installation of Kali Linux in Windows 10 Vmware full guide.


How to install Kali Linux In Windows 2020.

IF YOU ARE A BEGINNER  AND YOU DON'T KNOW ABOUT kali Linux pen-testing and Ethical Hacking, THEN YOU ARE IN A RIGHT PAGE.🤔

Kali Linux is a free and open-source distribution specifically designed to be a hacking tool for professional penetration testers. It is very attractive to new Linux users who are interested in Ethical hacking. However, Kali Linux is not designed for general purpose. 

It is simply not suited for use as a general-purpose desktop.

 If you're a new Linux user who installs Kali Linux, you will have a frustrating experience.

I WILL TELL YOU EVERYTHING ABOUT kali Linux pen-testing and hacking OPERATING SYSTEM AND ETHICAL HACKERS.

Install Kali Linux In VMware windows

Throughout the history of Kali Linux, the default user was the root, This is no more. The default user account is now a standard, unprivileged user. 

 Should you use Kali as your daily driver, as the primary OS? It’s up to you.

There wasn’t anything stopping you before, I just don’t encourage it. 

With XFCE and GNOME having had a Kali Linux look and feel update, it’s time to go back to the roots (days of backtrack-Linux) and give some love and attention to KDE Plasma. Introducing the dark and light themes for KDE Plasma.

BUT BEFORE THAT PLEASE DO CHECK THE DISCLAIMER AND PRIVACY POLICY SECTION AT THE TOPMOST MENU.🤨

IF YOU ALREADY READ THE DISCLAIMER AND PRIVACY POLICY THEN ONLY CONSIDER READING THIS PAGE.

NOW, I will install Kali Linux on Windows 10 with VMware, so this is an OS in OS configuration. Try it, because it might be more useful than Virtual Box.

Now, this is what you need-

  • A PC or Laptop Of course.

  • Kali Linux ISO image. To Download,> CLICK HERE

  • VMware software for Windows 10. To Download,>CLICK HERE

  • And a bit of patience.

STEP 1:- Download Kali Linux ISO image.

To install the Kali Linux, first, download the installer ISO image. You can download it by visiting the official download page. 

Please download the 64 bit or 32-bit image depending on the system you have. To check your system go to my computer > right-click > properties. This will show you your system information as to whether it is 32 - bit or 64 - bit.

Kali Linux official download page

STEP 2:- Now locate the downloaded file.

The filename would be kali-Linux-2020.2-installer-amd64.iso and would be around 3.6 GB.

STEP 3:- Now Open VMWare Workstation.

Open VMware Workstation. VMware Workstation 15.5 Pro Home Screen

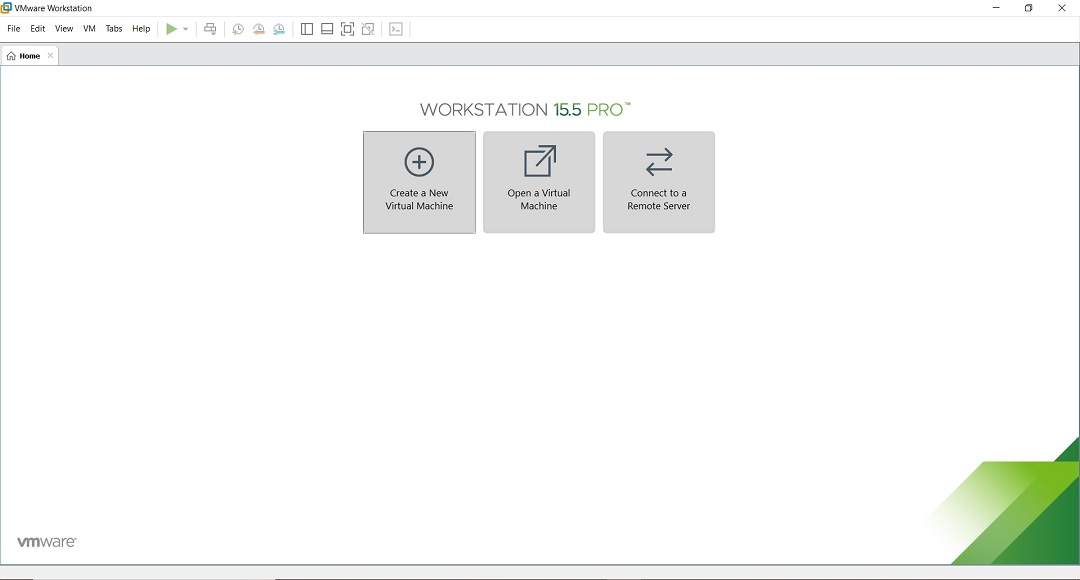
STEP 4:- Now Launch VMware Workstation New Virtual Machine installation wizard.

To launch the wizard to create a new virtual machine, Click on Create a New Virtual Machine or File > New Virtual Machine. “Welcome to the new Virtual Machine Wizard” dialog box will open.

STEP 5:- Welcome to the new Virtual Machine Wizard dialog box appears

This is where you get a chance to select the way virtual machines will be created. Typical is predefined or mostly the defaults. I will go with the default options. Select Typically and click Next.

VMware workstation home – create a new virtual machine wizard – welcome screen screenshot

VMware workstation – create a new virtual machine screenshot

STEP 6:- Select installation media or source.

In this dialog box, you will have to browse to the downloaded ISO file and click next. Generally, VMware Workstation detects the OS automatically and initiates what they call as the Easy Install. But this is not the case with Kali Linux. Please ignore that and click next to continue.

Kali Linux Installation - New Virtual machine Wizard - Browse Guest Operating System

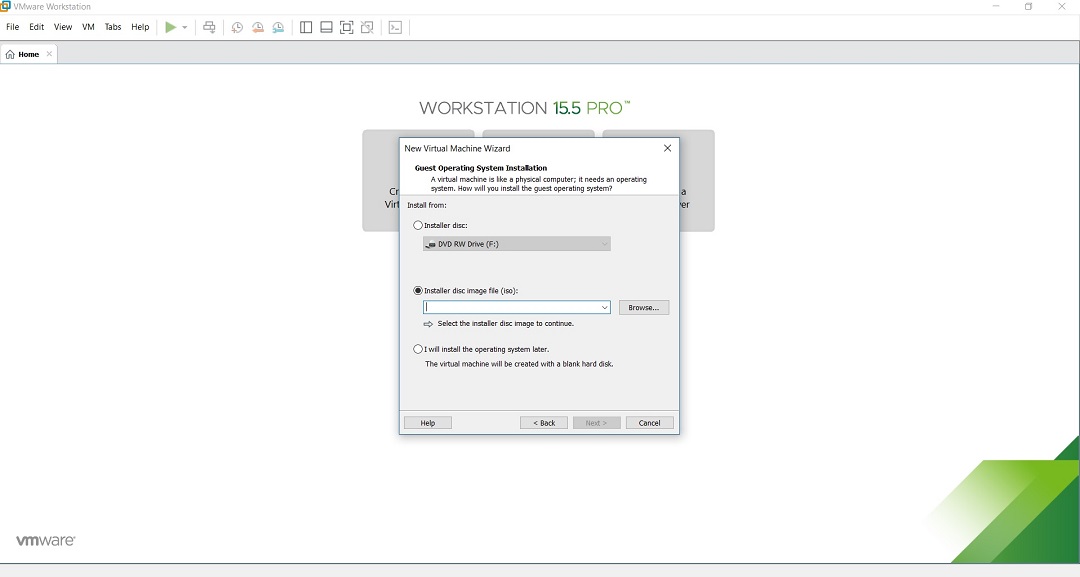
Kali Linux Installation – New Virtual machine Wizard Browse Guest Operating System

STEP 7:- Selecting the Guest Operating System

Select the Guest operating system as “Linux” and Version as “Debian 9.x 64-bit” or 32 bit depending on your system.

VMware Workstation – New Virtual machine Wizard – Select Guest Operating System

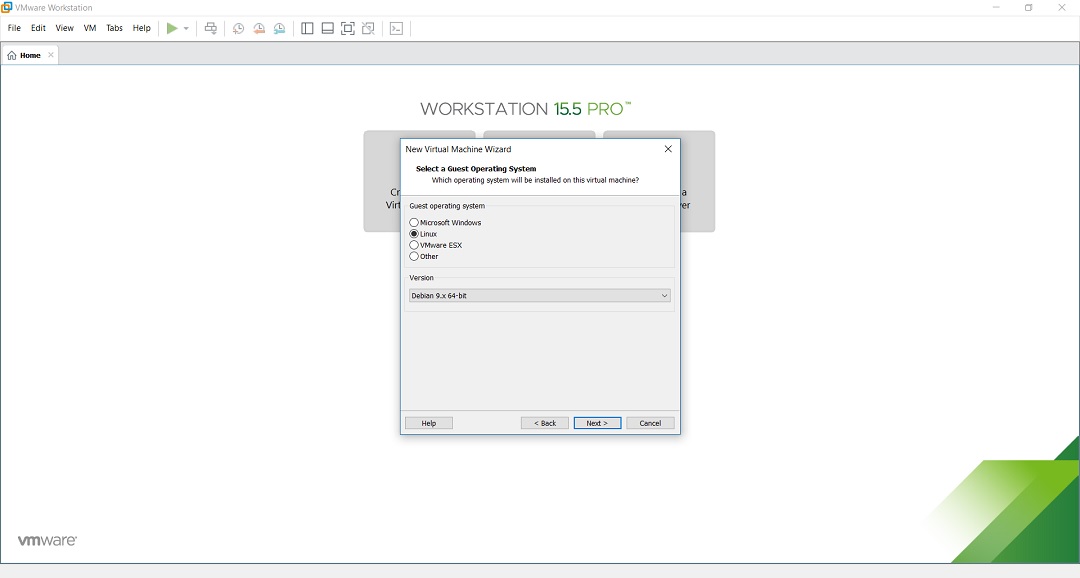
VMware Workstation  New Virtual machine Wizard  Select Guest Operating System

STEP 8:- Providing Virtual machine name.

You can provide any name you like. You can also change the location of the virtual machine. Provide a location that has more space. VMware Workstation - Install New Virtual Machine - Virtual machine name

VMware Workstation – Install New Virtual Machine – Virtual machine name

STEP 9:- Specify disk capacity.

This is the maximum amount of disk space it will utilize once the Virtual Machine is created. You can leave it to the default but if you are running low on disk space, you can reduce it to 20 GB.

Check Split Virtual Disk into multiple files. This is the default option. On a fresh install normally it takes 10 GB of space which will grow according to the software you install in the VM.

VMware Workstation - Create new virtual machine - specify disk capacity

VMware Workstation – Creating a new virtual machine – specify disk capacity

STEP 10:- Creating Virtual Machines.

VMware Workstation - Create new virtual machine - ready to create virtual machine

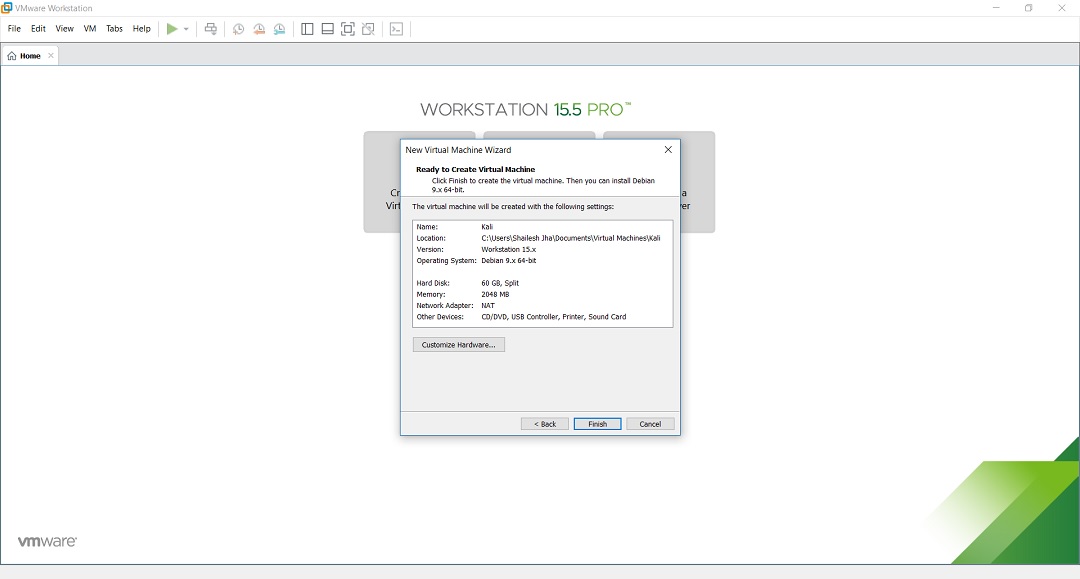
VMware Workstation  Create new virtual machine  ready to create a virtual machine

Increase the RAM and memory before clicking finish. This helps to finish the installation process faster. 

If you have sufficient RAM and CPU on your host Windows machine, I suggest you should even increase RAM and CPU. To increase the RAM, before clicking Finish, click on customize hardware. Increase the memory using the slider.

VMware Workstation - Virtual machine hardware settings - memory

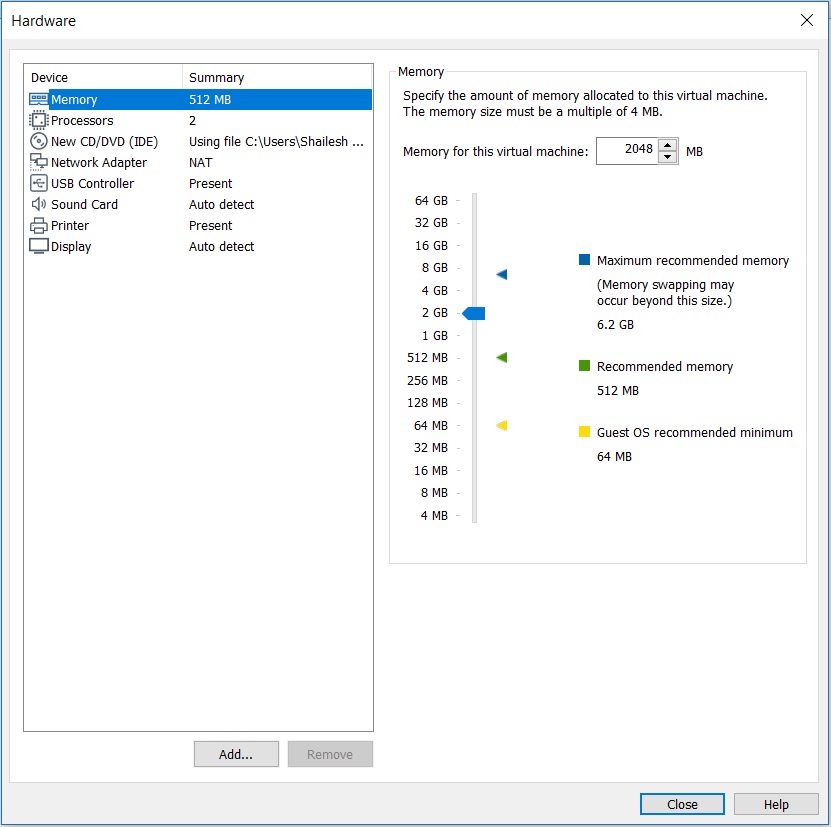
VMware Workstation – Virtual machine hardware settings – memory

To increase the CPU, Enter the number of the value of processors and the number of cores. Click on Finish to start the installation process.

VMware Workstation - Virtual machine hardware settings - processors

VMware Workstation – Virtual machine hardware settings – processors

Click on Close and Finish to start the installation process.

STEP 11:- Power on Virtual Machine.

Now you will have to power on the virtual machine to start the process. You can see the option to power on the VM on the top left-hand side.

VMware Workstation- Power on Virtual machine

VMware Workstation- Power on Virtual machine

STEP 12 – Select Graphical Install from Boot Menu.

Here you will see many options. Select Graphical Install using the down arrow key and click continue.

Kali linux installation boot menu screenshot

Kali Linux installation boot menu screenshot

STEP 13:- Select a Language.

Please select a language and continue. This option sets your language in the Kali Linux Operating system. The default is English.

Install Kali Linux 2020 - Select a Language Screenshot

Install Kali Linux 2020 – Select a Language Screenshot

STEP 14 – Select Location.

Please select a location and continue. This option sets your Location in the Kali Linux Operating system. later on, you will be able to set the time zone based on the location you choose here.

Install Kali Linux 2019 - Select Location Screenshot

Install Kali Linux 2020 – Select Location Screenshot

STEP 15 – Configure the Keyboard.

This option sets your Keyboard in the Kali Linux Operating system. By default, it is set to American English.

Install Kali Linux 2020 - Configure keyboard Screenshot

Install Kali Linux 2020 – Configure keyboard Screenshot

Install Kali Linux 2020 - Installation progress Screenshot

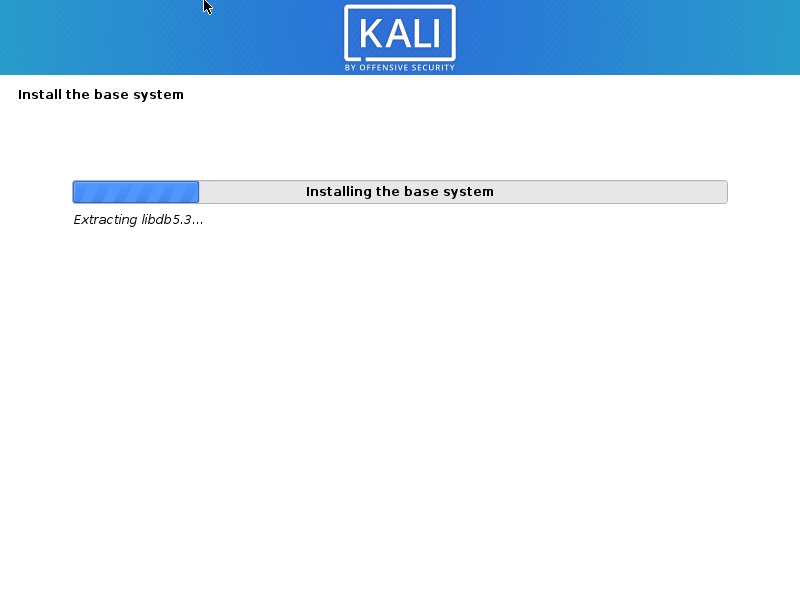
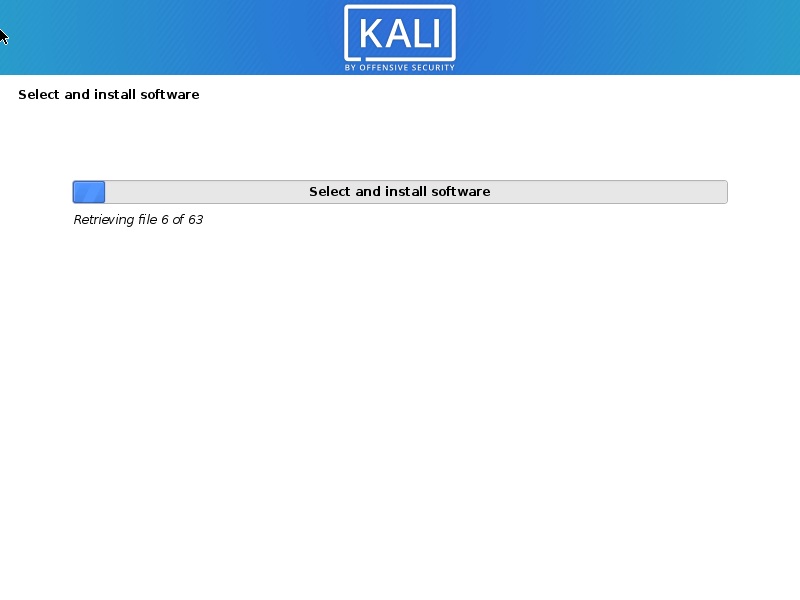
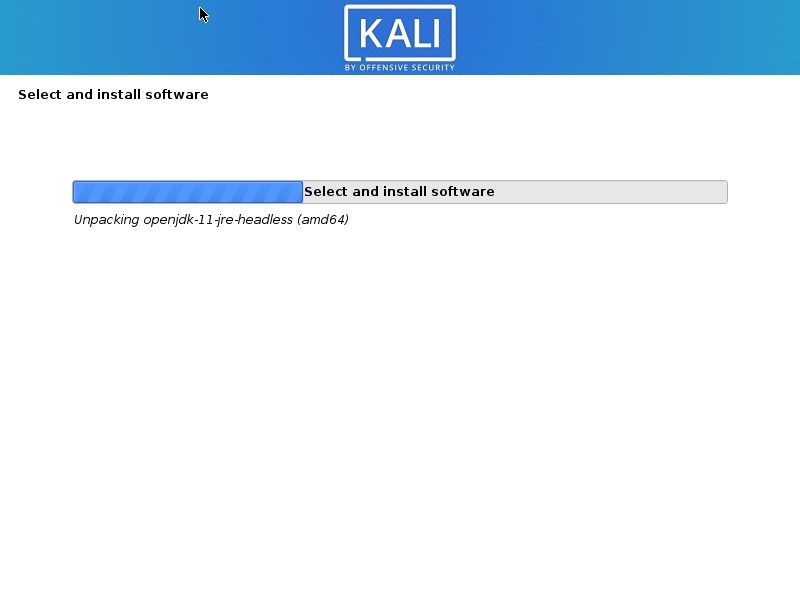
Install Kali Linux 2020 – Installation progress Screenshot

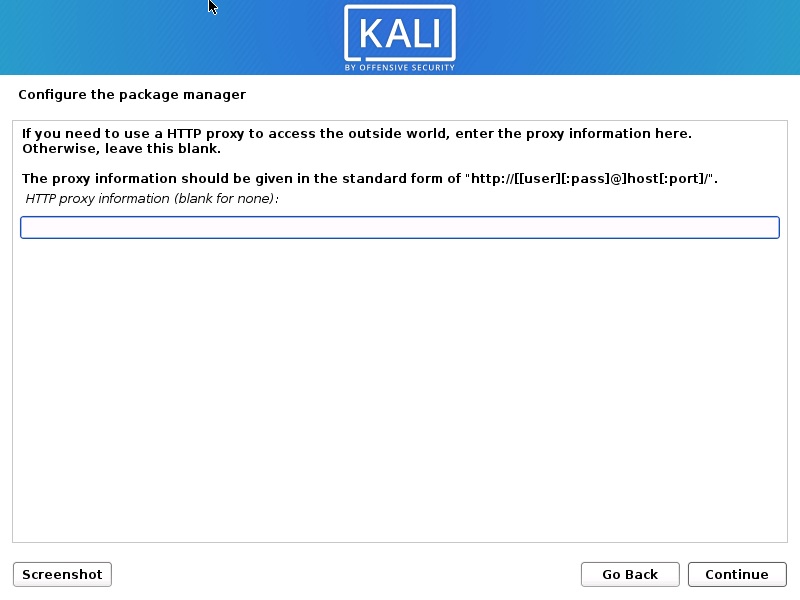
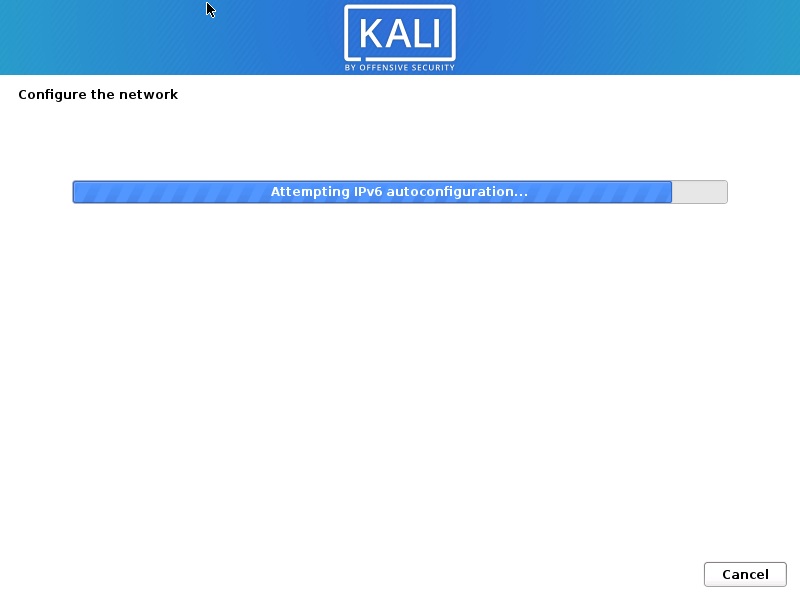
STEP 16:- Configure the Network – Enter Hostname.

This being a home network, we can set anything. Enter anything and click continue.

Install Kali Linux 2020 - Configure the Network Screenshot

Install Kali Linux 2020 – Configure the Network Screenshot

STEP 17 – Configure the Network – Enter the domain name.

Leave it blank.

Install Kali Linux 2020 - Configure the Network- Enter Domain Name Screenshot

Install Kali Linux 2020 – Configure the Network- Enter Domain Name Screenshot

STEP 18 – Set User account and password

In this dialog box, you will be asked to create an account other than the root user. Please note that this is the user other than the root user. To become root user set name as “root”

You will be asked to set up a password of the user you created. Enter the password. I will log in with this username and password once the installation completes. Set “toor” for the root user.

Kali Linux Installation - set user password

Kali Linux Installation – set user password

STEP 19 – Configure Clock.


Install Kali Linux 2020 - Configure Clock Screenshot

Install Kali Linux 2020 – Configure Clock Screenshot

STEP 20 – Partition Disk.

Select Guided – Use the entire disk and click continue. This is the default option.

Install Kali Linux 2020 – Select Disk to Partition Screenshot

Install Kali Linux 2020 – Select Disk to Partition Screenshot

In this dialog box, you are asked to select a disk to partition. Select sda, VMware Virtual disk. There should be only one option. Click Continue.

Install Kali Linux 2020 - Select Disk to Partition Screenshot

Install Kali Linux 2020 – Select Disk to Partition Screenshot

STEP 21 – Select the partition scheme

In this dialog box, you are asked to select a scheme for disk partition. Select the default, All files in one partition, and click Continue.

Install Kali Linux 2020 – Disk Partitioning Scheme Screenshot

Install Kali Linux 2020 – Disk Partitioning Scheme Screenshot

STEP 22 – Disk partition Overview

In this dialog box, you can see the summary of your disk partition. Select the Finish Partitioning and Write changes to disk which should be selected by default. All you have to do is to click continue.

Install Kali Linux 2020 - Disk Partition Overview Screenshot

Install Kali Linux 2020 – Disk Partition Overview Screenshot

STEP 23 – Disk partition Confirmation

In this dialog, you are asked to confirm Write changes to disk. Select yes and click continue.

Install Kali Linux 2020 - Disk Partition Confirmation Screenshot

Install Kali Linux 2020 – Disk Partition Confirmation Screenshot

STEP 24 – Installation starts

Now the actual installation starts. Wait for Configure the Package Manager Dialog box to appear.

Kali Linux - Installation begins

Kali Linux – Installation begins

STEP 25 – Configure the package manager – HTTP Proxy

In this dialog box, you will ask if you wish to HTTP proxy. Leave it blank and click continue.

Install Kali Linux 2020 - Configure the Package Manager - HTTP proxy Screenshot

Install Kali Linux 2020 – Configure the Package Manager – HTTP proxy Screenshot

The installation process will continue. Wait for some time and let the process continue.

Kali Linux Installation

Kali Linux Installation


Kali Linux 2020 Installation progress

Kali Linux 2020 Installation progress

STEP 26 – Software selection

On this screen, you will have to specify what software you want to install. I accept the default and accept it as it is. Click continue to proceed.

Kali Linux 2020 installation - Software selection

Kali Linux 2020 installation – Software selection


Kali Linux Installation progress

Kali Linux Installation progress

After all the files are retrieved, the installation will begin as shown in the below screenshot.

Kali Linux Installation progress

Kali Linux Installation progress

STEP 27 – Install GRUB boot loader

In this dialog box, you will be asked if you would like to install the GRUB boot loader. Select Yes and click Continue.

Install GRUB Boot Loader Screenshot

Install GRUB Boot Loader Screenshot

STEP 28 – Select device for GRUB boot loader Installation

In this dialog box, you will be asked to select the boot loader device for GRUB installation. Select /dev/sda and click Continue.

Select GRUB Boot Loader Device

Select GRUB Boot Loader Device

The installation will continue. Wait for the process to complete.

Kali Linux Installation progress

Kali Linux Installation progress

Kali Linux Installation progress

Kali Linux Installation progress

STEP 29 – Installation Complete

The installation will continue and now you will see Installation complete dialog box. Click to continue to finalize the installation and wait for the VM to reboot. After reboot, you will see the boot loader screen.

Install Kali Linux 2020 - Installation Complete Screenshot

Install Kali Linux 2020 – Installation Complete Screenshot

Process Completed.

After the VM starts, you will see the Grub boot loader. Select Kali GNU/Linux.

Kali Linux - Grub loader

Kali Linux – Grub loader

Login with your credential you created. Enter your username and Password

Kali Linux login screen

Kali Linux login screen

You will be logged into Kali Desktop 2020.

Kali Linux home screen

Kali Linux home screen


Rate this article

Loading...

Post a Comment

© CyberFaced - The Tech Blog. All rights reserved.

Cookies Consent

This website uses cookies to ensure you get the best experience on our website.

Cookies Policy

We employ the use of cookies. By accessing Lantro UI, you agreed to use cookies in agreement with the Lantro UI's Privacy Policy.

Most interactive websites use cookies to let us retrieve the user’s details for each visit. Cookies are used by our website to enable the functionality of certain areas to make it easier for people visiting our website. Some of our affiliate/advertising partners may also use cookies.